Guide
10 Basic Embroidery Stitches Every Stitcher Should Know
A clear, practical walkthrough of ten stitches that cover almost every design, with tips on when to use each one and how to make it look neat.
By Harshit Soni · Published · Updated
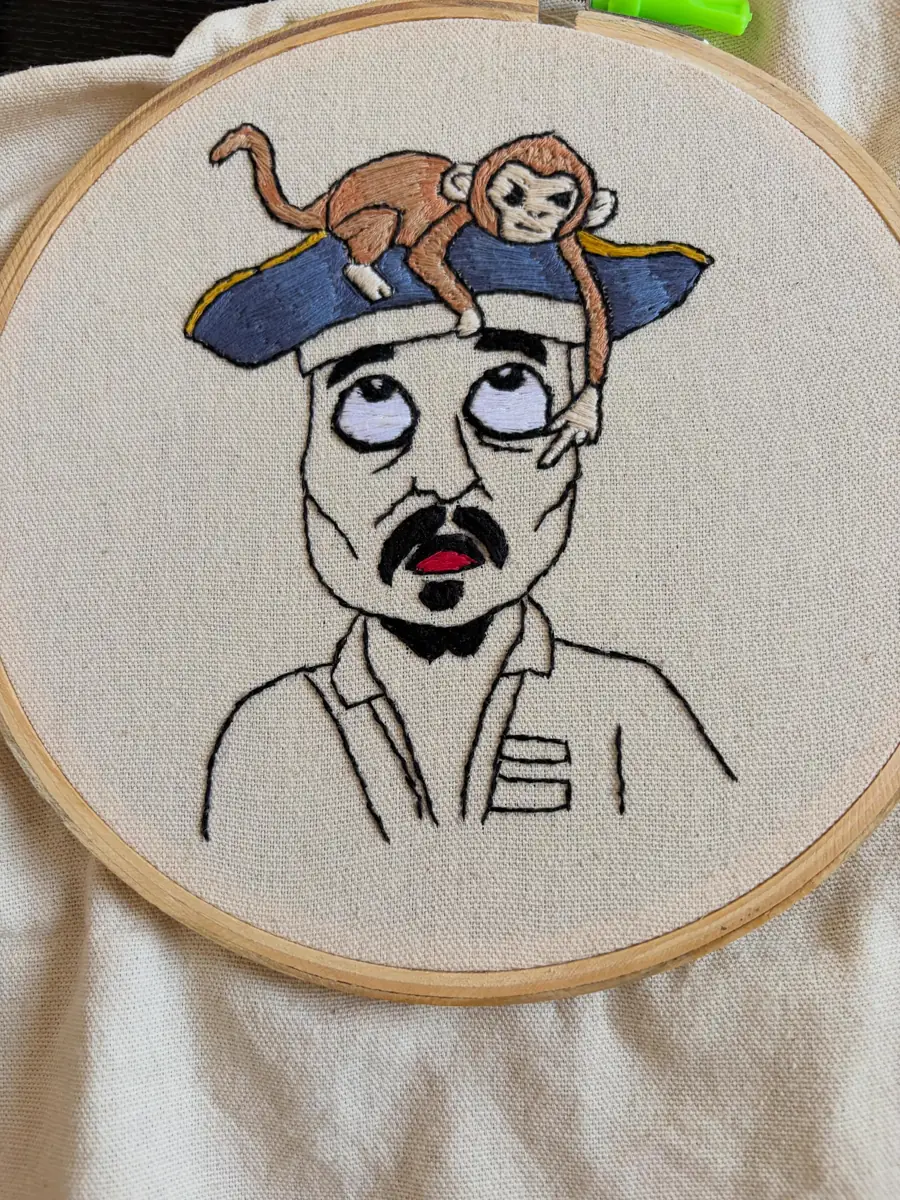
Basic embroidery stitches are the ten hand stitches that build almost every design: running, back, split, stem and chain stitch for lines; satin, long and short and seed stitch for fills; and French knots and lazy daisies for texture. Learn backstitch, satin stitch and French knots first, and you can finish a complete small design.
Look closely at any hand-embroidered piece, even a detailed portrait, and you will find it is built from a small set of repeated movements. Learn ten basic embroidery stitches well and you can stitch outlines, lettering, flowers, fills and soft shading without ever feeling stuck.
In our studio, most of what we make relies on just a few of these. Backstitch draws faces, outlines and lettering. Satin stitch gives smooth, glossy fills. Long and short stitch handles shading on skin and fabric folds. French knots and floral stitches add raised texture and make names bloom.
This guide explains how to work each stitch, where it shines and the small tricks that make it look tidy. We have grouped them by job: lines, fills and texture. Keep a practice hoop nearby and try each one as you read.
Key takeaways
- Backstitch is the most useful stitch for outlines, faces and lettering.
- Satin stitch gives smooth fills but works best on small shapes.
- Long and short stitch creates soft shading on skin, hair and petals.
- For bigger French knots, add strands rather than extra wraps.
- A sampler hoop is the easiest way to practise and compare stitches.
How should you set up before practising stitches?
Before practising, make sure your fabric is drum-tight in the hoop and your thread is cut to a comfortable length, roughly fingertip to elbow. Stitches only look as good as the surface they sit on.
- Use two strands of stranded cotton for most practice. It is thick enough to see and thin enough to control.
- Use a sharp embroidery needle whose eye takes the thread without forcing it.
- Draw light guidelines: a few straight lines, a curve, a circle and a leaf shape give you something to practise on.
- Work in good light, and let the needle dangle every so often so the thread untwists.
If you are completely new, our hand embroidery for beginners guide covers hoop setup, threading and starting knots in more detail.
Which basic embroidery stitches are best for outlines?
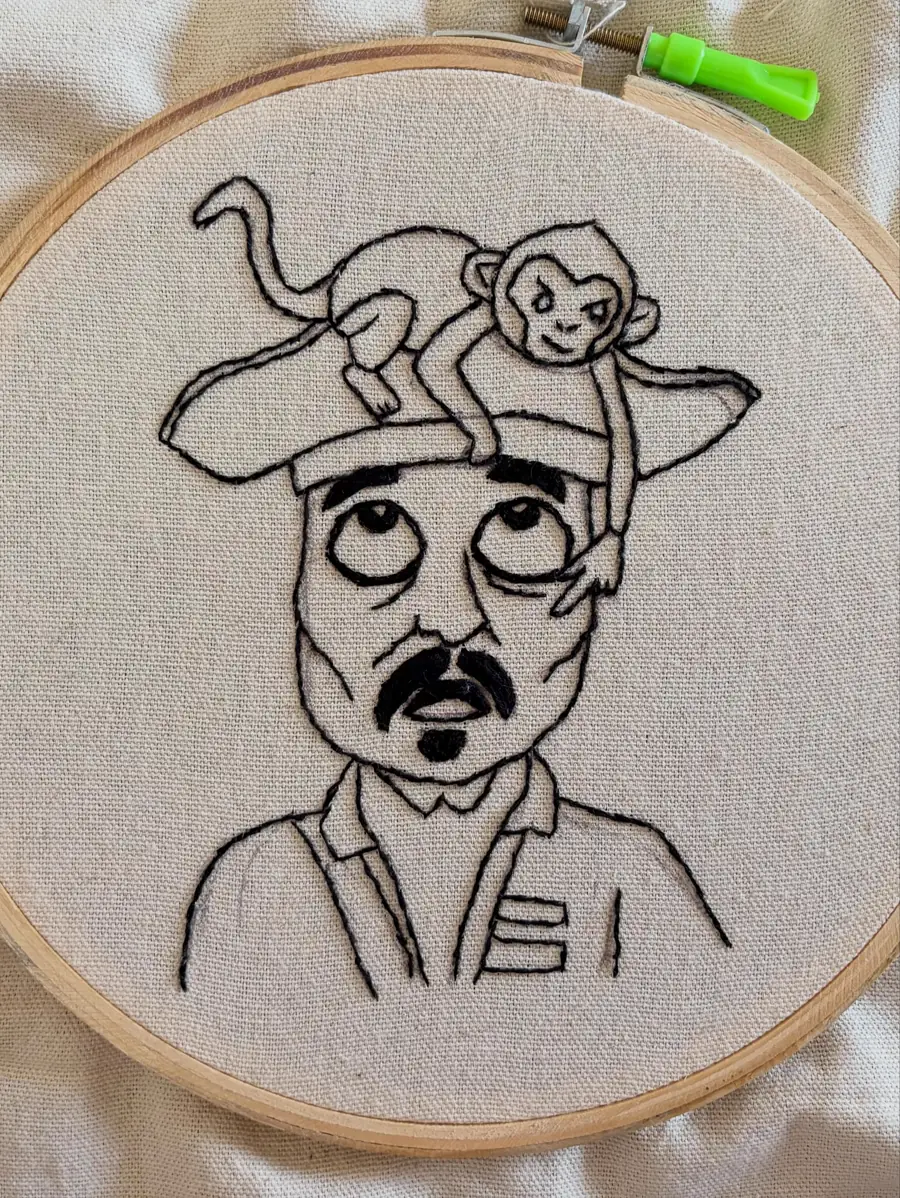
The best basic embroidery stitches for outlines are running, back, split, stem and chain stitch, which all draw the shape of your design. Line stitches are the first thing we stitch on almost every piece, because a clean outline makes everything else easier to fill.
1. Running stitch
Bring the needle up at the start of your line, go down a short distance along it, then come up again leaving a gap of about the same length. Repeat to make a dashed line.
Use it for: simple borders, quilting-style details, sketchy or playful lines, and as a quick guide line that you later cover. Keep stitches and gaps even; that regularity is what makes it look intentional.
2. Backstitch
Come up one stitch length ahead of where your line starts. Go down at the start point, then come up another stitch length ahead. Each new stitch goes back into the hole at the end of the previous one, making a solid, continuous line.
Use it for: outlines, facial features, text and fine details. This is our most-used stitch; almost every character hoop begins with a black backstitch outline. On tight curves and small letters, shorten your stitches so the line bends smoothly instead of looking jagged.
3. Split stitch
Make one small straight stitch. Come up through the middle of that stitch, splitting the strands, then go down a stitch length ahead. Repeat. It works best with an even number of strands so the needle can split them cleanly.
Use it for: slightly textured lines that look like a fine chain, and as an edge underneath satin stitch. Stitching satin over a split stitch outline gives a crisp, slightly raised edge.
4. Stem stitch
Working along your line, make a stitch, then come up about halfway back along it, just beside it. Always keep the working thread on the same side of the needle. The stitches overlap into a twisted, rope-like line.
Use it for: flower stems, vines, flowing curves and cursive lettering. It follows curves beautifully. If the line starts to look like backstitch, you have probably switched which side the thread is on.
5. Chain stitch
Come up at the start. Go back down in the same hole, leaving a small loop on the surface. Come up a stitch length ahead, inside the loop, and pull gently to shape it. Repeat, and finish the last loop with a tiny anchoring stitch over it.
Use it for: bold outlines, lettering that needs weight and decorative borders. Rows of chain stitch placed side by side also make a textured fill.
Which stitches fill and shade a shape?
Satin stitch, long and short stitch and seed stitch fill a shape with colour once the outline is done. These take the most thread and the most patience, but they are where a design comes alive.
6. Satin stitch
Satin stitch covers a shape with straight stitches laid side by side, each running from one edge of the shape to the opposite edge. Start in the middle of the shape at its widest point and work out to one side, then return to the middle and work the other side. This helps keep the angle consistent.
Use it for: petals, leaves, small solid areas, eyes and lettering fills. Tips for a smooth finish:
- Keep shapes smallish. Very long satin stitches can loosen and snag over time.
- Lay stitches close together without overlapping so no fabric shows through.
- Keep the angle consistent across the shape; a change in direction catches light differently.
- Outline first in split stitch or backstitch, then stitch just over the outline for a clean edge.
7. Long and short stitch
This is the stitch for shading, sometimes called thread painting. The first row alternates long and short stitches along the edge of the shape. The next row uses stitches of similar length that come up through the ends of the previous stitches, splitting them slightly. Each row can move a shade lighter or darker.
Use it for: skin tones, hair, clothing folds, petals with gradients and anything that needs a soft colour change. We rely on it for faces and fabric in our character hoops. Keep stitch direction following the form, the way a pencil would shade it, and blend in neighbouring shades rather than jumping from very light to very dark.
8. Seed stitch
Scatter tiny straight stitches in random directions across an area. You can make them singly or in pairs placed side by side.
Use it for: light texture, sandy or grassy ground, freckles, and gradual fills where you place stitches densely in one area and sparsely in another. It is forgiving, making it a restful stitch when you want a break from precise work.
Which stitches add raised texture?
French knots, lazy daisies and woven wheel roses add raised texture that sits up off the fabric and catches light and shadow. They are what make floral names and wreaths feel alive.
9. French knot
Bring the needle up. Hold the thread taut with your other hand and wrap it once or twice around the needle. Keeping tension on the thread, insert the needle very close to where it came up, not in the exact same hole. Slide the wraps down to the fabric and pull the needle through slowly.
Use it for: flower centres, eyes, dots, tiny buds and clustered texture like baby's breath. For a bigger knot, add strands rather than extra wraps; too many wraps tend to make floppy knots.
10. Lazy daisy (detached chain)
This is a single chain stitch. Come up, go back down in the same spot, leaving a loop. Come up at the tip of where you want the petal, inside the loop, and make a tiny stitch over the loop to hold it in place.
Use it for: quick petals arranged in a circle, small leaves and delicate sprigs. Five or six lazy daisies around a French knot make a sweet little flower in minutes.
A bonus bloom: woven wheel rose
Stitch an odd number of straight spokes, usually five, from a small centre outwards, like a star. Bring a thread up near the centre and weave it over and under the spokes, round and round, without going into the fabric. Pull loosely so the petals puff up. The odd number of spokes lets the over-under pattern alternate on each round.
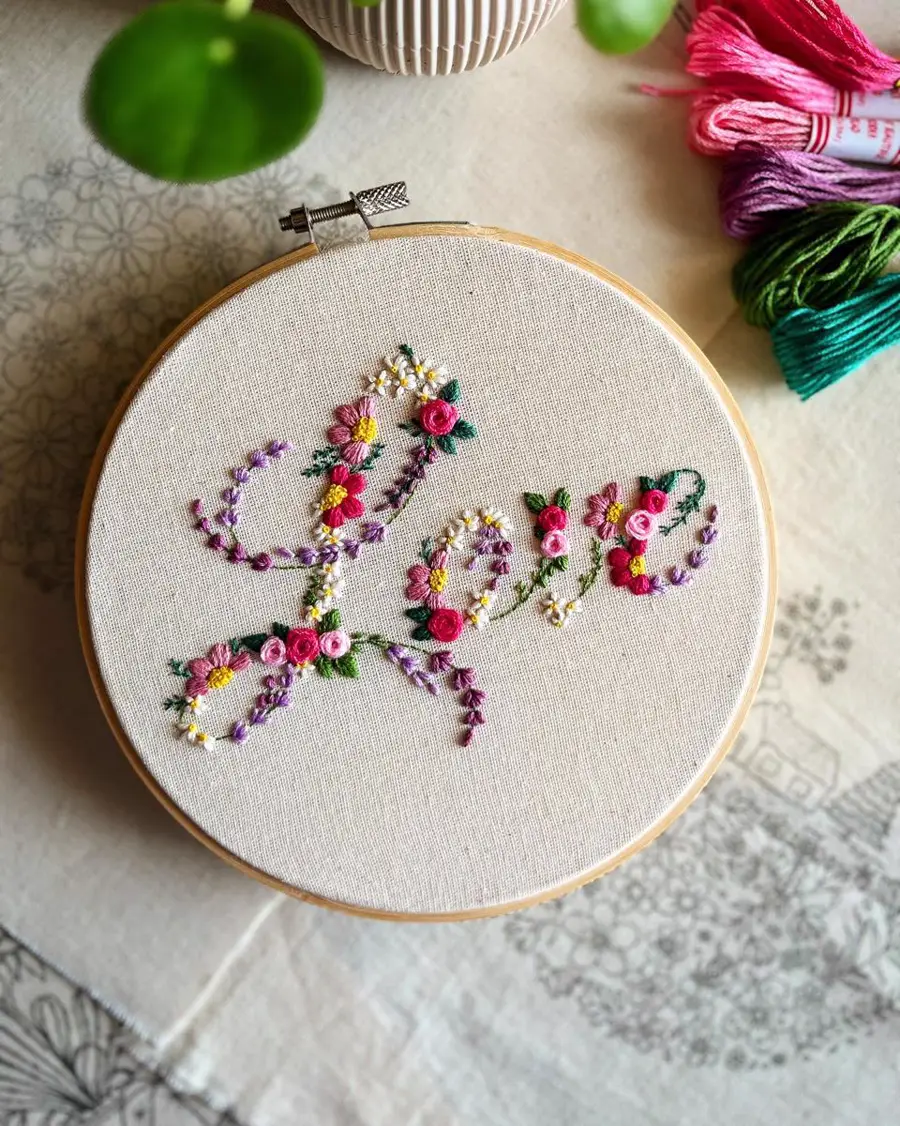
Our "Love" hoop and floral name sweatshirt combine backstitch lettering with these texture stitches. You can see more of them in our Names and Florals collection.
How do you choose the right stitch for each part of a design?
Choose each stitch by the job it does: backstitch for fine lines, satin stitch for small solid shapes, long and short stitch for gradients and French knots for dots. There is no single right answer, but these pairings are a reliable starting point.
- Faces and fine features: backstitch with one or two strands.
- Lettering: backstitch for small text, stem or chain stitch for flowing script, satin for bold block letters.
- Small solid shapes: satin stitch.
- Large areas or gradients: long and short stitch.
- Stems and vines: stem stitch.
- Petals: lazy daisy, satin stitch or woven wheel roses.
- Dots and centres: French knots.
| Stitch | Type | Look | Best for |
|---|---|---|---|
| Running stitch | Line | Dashed line | Borders and playful details |
| Backstitch | Line | Solid, continuous line | Outlines, faces and small lettering |
| Stem stitch | Line | Twisted, rope-like line | Stems, vines and cursive script |
| Chain stitch | Line | Linked loops | Bold outlines and borders |
| Satin stitch | Fill | Smooth, glossy surface | Petals, leaves and small shapes |
| Long and short stitch | Fill | Soft blended shading | Skin tones, hair and gradients |
| French knot | Texture | Raised dot | Flower centres, eyes and buds |
| Lazy daisy | Texture | Single loop petal | Quick petals and small leaves |
Colour matters just as much as stitch choice. Our guide to choosing thread colours explains how to build palettes that blend well.
Practising stitches with a sampler
A sampler is one hoop that holds a row or small patch of each stitch. It becomes your personal reference: when you forget how stem stitch looked with three strands, you can check it.
- Divide a 6 inch hoop into rows with a pencil.
- Stitch each stitch twice: once with two strands, once with three or four.
- Label each row lightly with its name in backstitch if you like.
- Add a small shape filled with satin and another with long and short stitch to compare.
- Keep adding to it as you learn new stitches.
It is also the best way to spot your habits. If all your satin shapes lean to the left, or your French knots are loose, you will see it clearly in a sampler before it shows up in a gift.
Troubleshooting common stitch problems
Most stitch problems come from a loose hoop, uneven tension or worn thread, and each one has a quick fix.
- Puckered fabric around stitches: the hoop is loose or you are pulling too hard. Re-tension and ease off.
- Gaps in satin stitch: stitches are too far apart or the thread is too thin. Add a strand or place stitches closer.
- Messy satin edges: outline first and bring the needle up and down exactly on the line.
- Knots that pull through to the back: insert the needle slightly beside the entry point, not in the same hole.
- Stripy shading: long and short rows are too regular. Vary stitch lengths and split into the previous row.
- Frayed, fuzzy thread: the length is too long or has been pulled through too many times. Cut a fresh piece.
Frequently asked questions
Which basic embroidery stitches should I learn first?
Start with running stitch and backstitch for lines, then satin stitch for fills and French knots for texture. Those four let you finish a complete small design. Add stem, chain, lazy daisy and long and short stitch as you go.
What is the difference between backstitch and stem stitch?
Backstitch makes a flat, continuous line where each stitch meets the last end to end. Stem stitch overlaps each stitch with the previous one, giving a twisted, rope-like line that flows well around curves.
How many strands should I use for satin stitch?
Two or three strands of stranded cotton is common for small shapes. Fewer strands give a smoother, finer look but take longer to cover; more strands fill faster but can look bulky.
Why do my French knots keep disappearing to the back?
Usually the needle is going back into the exact hole it came out of. Insert it a thread or two away, and keep the working thread taut while you pull through.
Do I need special needles for different stitches?
A sharp embroidery needle works for nearly everything here. For the weaving part of a woven wheel rose, a blunt tapestry needle, or passing the eye end of your needle, makes it easier not to split the spokes.
Put these basic embroidery stitches to work
Ten basic embroidery stitches may not sound like much, but they are enough to stitch almost anything, from a tiny initial to a detailed, shaded character. Practise them one at a time, keep a sampler and let each project introduce just one new stitch.
When you want to see these stitches combined at full scale, look through the hoops in our shop, or follow each stage on our process page. And if you would like a piece stitched just for you, share your idea through our custom order form.
Topics: basic embroidery stitches, hand embroidery stitches for beginners, types of embroidery stitches, backstitch embroidery, satin stitch tutorial, french knot embroidery, long and short stitch shading, embroidery stitches for outlines